Showing posts with label Grilled. Show all posts

Thursday, June 25, 2015

Grilled Vegetable Quesadillas with Goat Cheese

Fresh local vegetables are a great perk in the summer months. They have so much flavor on their own they need very little prep or other ingredients to make a tasty meal. I often grill a bunch at once and keep them in the fridge to have alongside of burgers or toss them on top of sandwiches and salads. I know women tend to shy away from the grill and leave the outdoor cooking to the men but that's just silly.  I have no problem firing up our gas grill when John's not home to make a great summer meal. Since I've stumbled upon this grilled vegetable quesadilla from Pinterest, I've made it for myself 4 times and served it to my grandma, my mom and my husband. Everyone raves how great the flavors and textures combine together; the creamy goat cheese with the crispy tortilla. The sweet and sticky balsamic glaze with the char from the grilled vegetables. I may just have to make myself another one of these today for lunch!! 


Ingredients for 4 Quesadillas:
2 Zucchini - Halved & Sliced Thick
2 Yellow Squash - Halved & Sliced Thick
2 Red Peppers - Cored and Sliced into Large Pieces
2 Large Onion - Sliced Thick
8 oz Crumbled Goat Cheese
1 Tbsp Olive Oil
8 Large Whole Wheat Tortillas
Generous Drizzles of Balsamic Glaze

Preheat your outdoor grill, indoor grill or grill pan to medium, wipe it down with an oiled paper towel or spray it with some Pam. Wash and slice your veggies thick so you won't loose them in between the rungs. Grill all your vegetables for about 5 minutes on each side. If you don't like one of the veggies I chose to use another option would be portabello mushrooms. I found it easiest to use tongs to flip and remove the vegetables instead of a spatula. After they've cooled off a bit dice them up into bite size pieces.

In your largest pan that's flat or on a griddle heat up the olive oil over medium. Place one of the tortillas down in the pan. Making a flat layer arrange the vegetables evenly all the way out of the sides of the tortilla. Put down as many pieces as you can fit making sure you get all the different kinds spread out around the whole thing.

Crumble the goat cheese on top of the vegetables. Spreading it out as much as possible, use about 2 ounces to assure it will melt and hold on to the tortilla on the top so the quesadilla doesn't fall apart. The first time I made this I bought a cylinder of goat cheese and had a terrible time dividing up the smooth tube of cheese into chunks so if you can find it already crumbled in a container that works best. 

Place another tortilla on top of the goat cheese and using the back of a spatula press it down hard. After another minute or two it's time to flip it over, being very careful and working quickly flip the  whole quesadilla over so the second side gets nice and crispy. After about 3-4 minutes using the spatula slide it out. Place it on a flat surface, using a pizza cutter slice it into quarters and drizzle it with balsamic glaze.

Enjoy!!


Linked at: http://www.thecountrycook.net/

Thursday, May 21, 2015

Lemon & Dill Grilled Salmon

Every week I walk by the Seafood department and see beautiful pink pieces of Salmon. I love almost all seafood but Salmon has never been my favorite so I've never prepared it at home even though John loves it. I decided to take on the challenge and give it a try this week.  I love the combination of lemon and dill on seafood so I made a simple sauce and put it on the grill with some asparagus. It was easy and quick to make plus it tasted amazing, John told me he thought I could serve it in a restaurant and even Owen ate a few bites of it!! The salmon was moist and the sauce was buttery this recipe definitely swayed my thought on Salmon and we will be having it again sometime soon. 


Ingredients:
About 1lb Fresh Wild King Alaskan Salmon
2 Tbsp Fresh Squeezed Lemon Juice
2 Tbsp Olive Oil
1 Tbsp Margarine
1 Tsp Dried Dill
1 Tsp Dried Basil
1 Tbsp Honey Dijon Mustard
1 Tsp Salt
4 Cloves Garlic - Minced
2 Dashes Cayenne Pepper

Adapted from: http://www.inspired2cook.com/

In a small pot combine all of the ingredients for the sauce. Mix everything together stirring occasionally over medium heat. Bring to a boil and reduce heat, allow it to simmer for about 5 minutes.

Using heavy duty tin foil place the salmon skin side down in the middle of  a large piece. Fold all four sides up creating a little boat for the fish. 

When the sauce is done slowly pour it over the top trying to keep most of it on the fish. Some of the oil will slide off into the boat but that's fine. If you need to spread it out evenly over the entire piece of fish with your spatula.


Preheat your outdoor grill to about 400-450 degrees. Place the foil on the grill and close the lid for 10-12 minutes. Conveniently the asparagus take just as long so I chose to grill them at the same time with just some olive oil, salt and pepper, turning them once while they grilled. If you aren't a fan of using a grill or you don't have one you can close the foil packet and bake this recipe in the oven at 350 F for 15-20 minutes.

You'll know the fish is done with it looks opaque, flaky and lighter pink instead of dark pink and shiny. The edges may be slightly crisp from the skin which is fine. Allow it to cool for a few minutes when you get it inside then slice into pieces and serve. Part of the reason I don't usually prefer salmon is the skin and in this preparation it stuck onto the foil so I was pleasantly surprised I didn't have to pick it off my piece.

Enjoy!!


Linked at: http://www.thecountrycook.net/

Monday, April 6, 2015

Greek Turkey Burgers

Even though it's officially been Spring for the last two weeks it didn't feel like it here in New Jersey until the other day. Finally the flowers are starting to come out of the ground and the leaves are beginning to come back. I am certainly ready to welcome the warmer weather and I think after the winter we've had most people would agree with me!!

 This recipes makes 4 large or 6 slider sized burgers. These burgers are full of flavor, the feta cheese and tzatiki sauce keeps them nice and moist and the cucumber topping gives it a fresh crunch. They also pair nicely with some homemade roasted sweet potato fries. Hopefully these Greek turkey burgers will give you the perfect reason to get outside and fire up the grill for the first time this season!! If you aren't quite ready to head outdoors to use your gas or charcoal grill a counter top sandwich press or stove top grill pan works just as well.

Ingredients for Burgers:
1.25lb Ground Turkey
1 Egg
3 oz Frozen Chopped Spinach - thawed & squeezed
8-10 Sun-dried Tomatoes - Diced
1 1/2 Tsp Garlic - Minced
1/3 Cup Crumbled Feta Cheese
1 Tsp Oregano
1/4 Tsp Cumin
1/4 Tsp Coriander
1/2 Tsp Salt
1/4 Tsp Pepper

Ingredients for Tzatziki:
5oz Container Plain Low Fat Greek Yogurt
1/2 Fresh Lemon - Squeezed
1/2 Tsp Garlic - Minced
3 Tbsp Cucumber - Peeled, Seeded and Minced
1/2 Tsp Oregano
S&P

Burger Garnishes:
More Feta Cheese
Sliced Cucumber
Homemade Tzatziki Sauce
Burger or Slider Rolls

Adapted from: http://www.budgetbytes.com/

Preheat and grease your grill. Thaw some of the frozen chopped spinach and squeeze out as much liquid out of it as you can. In a large bowl combine the ground turkey meat, spinach, sun-dried tomatoes, egg, feta cheese and spices.

Using your hands mix all of the ingredients together until you feel that all of the spices are mixed in and the cheese, spinach and sun-dried tomatoes are spread out evenly. You can score the meat and try to divide it in equal parts as best you can. I got 4 large burgers ready to grill but I realized that I had purchased slider sized rolls so after taking all of these pictures I reformed my patties to make smaller ones.
When you are forming the patties make sure that they are thinner in the middle and a little bit thicker towards the outside. This will help the burger cook evenly and keep your patties flat. Grill your burgers for about 10 minutes, flipping once. Since it is turkey you don't want any raw meat in the center. 
While your burgers are grilling it's time to make your tzatiki sauce. In a small bowl combine the Greek yogurt with the garlic, lemon juice, oregano, cucumber, salt and pepper. When the burgers are ready to serve put them on the rolls. top them with the sauce, some extra cheese and a few slices of cucumber. The cucumber will bring some freshness and crunch to the creaminess of the other toppings. 

Enjoy!!

Monday, July 28, 2014

Sweet Thai Chili Grilled Shrimp & Vegetables

We are huge fans of Red Thai Chili Sauce so when I saw it used in a recipe with grilled shrimp I immediately wanted to give it a whirl. This sauce has the perfect combination of heat and sweet making it one of our favorite condiments. We always have it on top of chicken stir-fry or use it as an Asian dipping sauce, we've even gone as far as putting on top of a Thai Chicken Pizza but since it's summer time I wanted to use it on the grill. I skewered shrimp, vegetables and pineapple, brushed it all with the sauce and put it on top of a bed of jasmine rice for a complete, quick & easy summer meal. 

Ingredients:
8 Wooden Skewers
20-25 Large Shrimp - Defrosted, Cleaned & Tails off
1 Cup Pineapple - Large Chunks
1 Red Pepper - Large Chunks
1 Green Pepper - Large Chunks
1/2 Onion - Large Chunks
4 Tbsp Red Thai Chili Sauce
2 Tbsp Light Mayonnaise
1 Tsp Fresh Chives - Chopped & more for garnish
Pam Spray

Adapted from: http://www.skinnytaste.com/

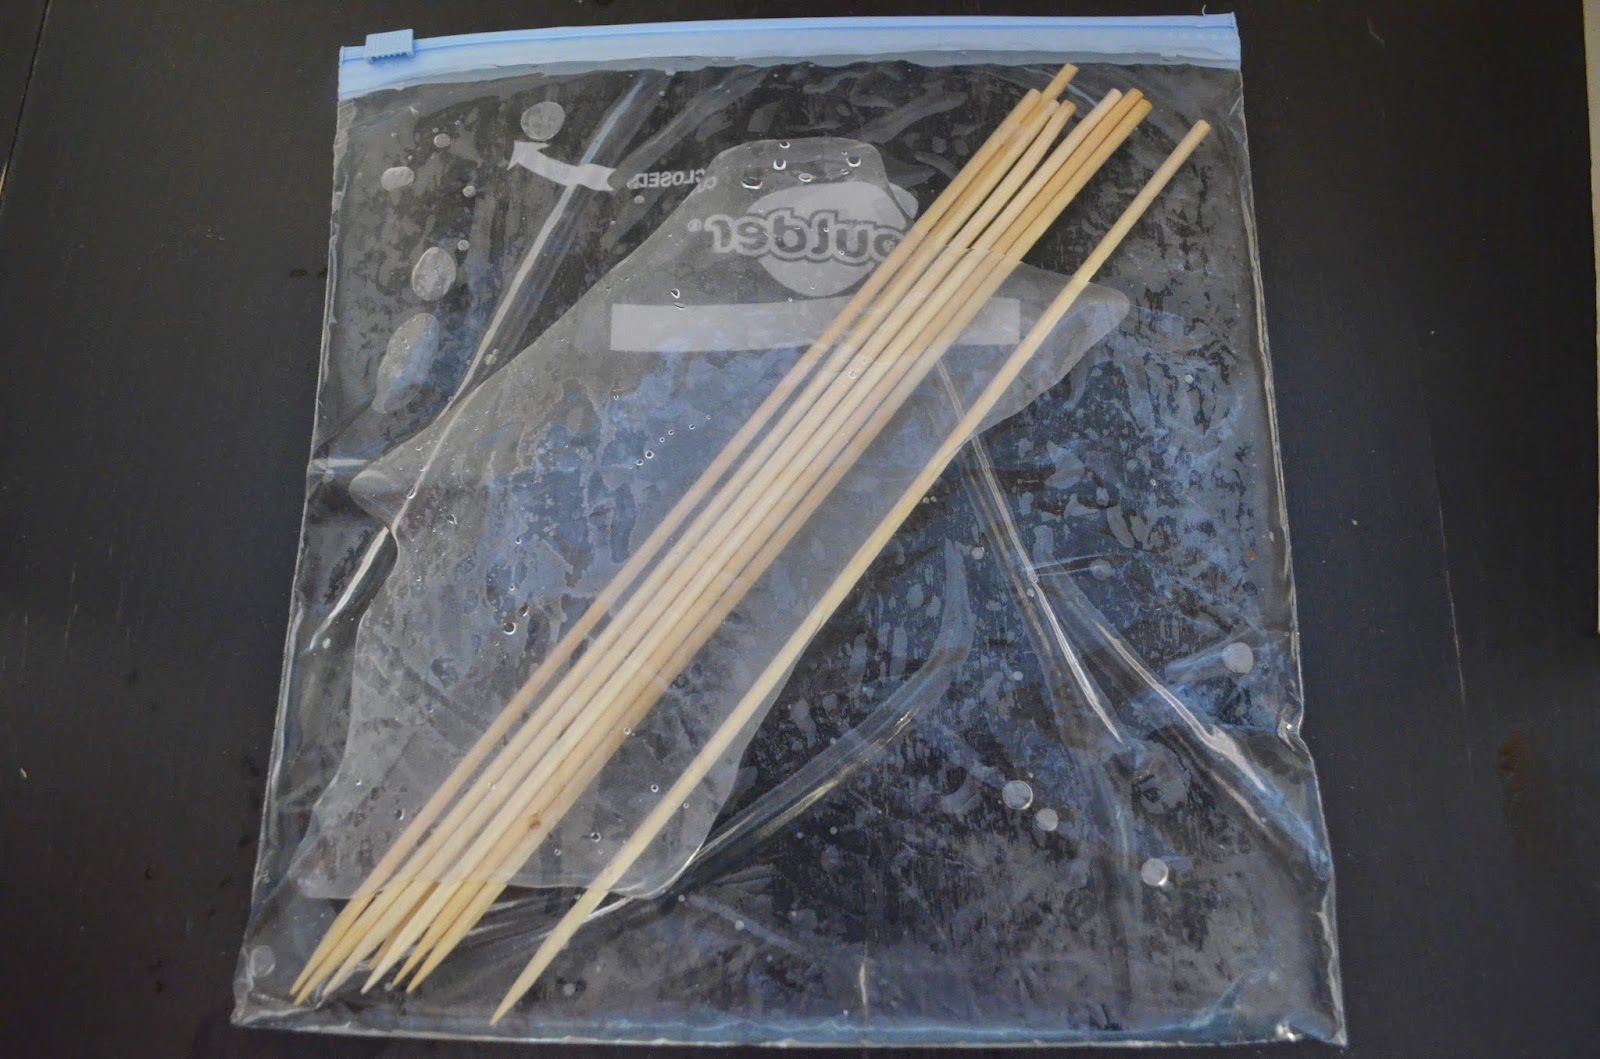
If you are using wooden skewers to grill it's important to soak them in water for about 30 minutes. I could never find a good way to do this until the other day when I decided to put them with the water in a gallon freezer bag. It worked perfectly, so much better than a large bowl with half the skewers sticking out. Obviously if you are using metal skewers this step is obsolete but be careful not to burn yourself as they get hot very quickly. 
While the skewers are soaking you can prep your shrimp and veggies. Although it looks cool to make skewers with both the shrimp and vegetables they have different cooking times so its easier to keep all the shrimp together and then have the vegetables on their own set of skewers. Put 4-5 shrimp on a skewer pushing them into the middle and allowing for room on either side of each shrimp. Place vegetables and fruit on skewers and set both aside.
Make sure your grill has been cleaned, spray it with Pam and preheat it to medium heat. Now it is time to make your Sweet Thai Chili Sauce. In a medium sized bowl combine the mayonnaise with the red Thai chili sauce and chives.
The shrimp will grill about 6-8 minutes a side until the have curled, are pink and opaque with some grill marks. The vegetables will take about 10 minutes each side. As everything grills you can brush the sauce on top. Make sure to keep some sauce aside to brush on to both the shrimp and the vegetables right before you eat. To make this into a complete meal serve the skewers on top of some jasmine rice and top with more fresh chives.
Enjoy!!

Monday, September 17, 2012

Stuffed Grilled Peppers


This was the first ever recipe I pinned to make on Pinterest when I finally joined the site back in May. I don't know  what took me so long to join because I can't imagine a day without looking at Pinterest now that I'm hooked haha. Of course when I click on the picture of these Stuffed Grilled Peppers now months later the link to the original page is gone. Good thing the pinner before me kept the list of the ingredients in the description, I figured the rest out on my own. This recipe is perfect for a quick and easy Meatless Monday meal or great for a healthy bring to work lunch alternative.

Ingredients:
4 Whole Red Bell Peppers
1 Cup Uncooked Brown Rice
1 Small Red Onion - Diced
1/2 Pint Grape Tomatoes
2 Tbsp Olive Oil
1 Zucchini - Diced
1 Tbsp Minced Garlic
3/4 Cup Grated Parmesan Cheese
1 Tbsp Italian Seasoning
1 Cup Shredded Part Skim Mozzarella
S&P
 Preheat your oven to 400 F. Prep all of your veggies, dice your zucchini and red onion, slice your peppers in half vertically and gently take all of the ribs and seeds out of them. Place your zucchini, grape tomatoes and red onion on a baking sheet. Drizzle the tray with 1 Tbsp of Olive Oil, then salt and pepper the veggies. Give the tray a good shake to make sure they all are coated and seasoned. Roast about 40 minutes, giving them another shake and flip about half way through the cooking time.
While the veggies are roasting in the oven, turn on your outdoor grill to medium heat for your peppers. Also you can now prepare your cup of brown rice according to the package. Grill both sides of your peppers for 3-4 minutes depending on their size and the heat of the grill. You want some char marks on them but you obviously don't want them to be burned. Once they are finished grilling, set them aside.
When your veggies are almost done roasting, in your largest pan over a medium flame, heat up the remaining Tbsp of Olive Oil. Saute the minced garlic for 1-2 minutes until fragrant. Add the cooked rice to the pan as well as the roasted vegetable giving it a few stirs to combine everything together. Don't turn your oven off just change it over to the broiler setting which you will be using in a few minutes.
Sprinkle the Italian Seasoning on top as well as some salt & pepper. Add the Parmesan cheese and stir again so the cheese is evenly distributed. Line the grilled peppers up on the baking sheet you used for the roasted vegetables. Spoon the rice and vegetable mixture into the peppers until they are completely filled.
Sprinkle the shredded mozzarella cheese on top of the stuffed peppers and put them under the broiler for about 2 minutes which will melt the cheese making it bubbling and brown
Enjoy!! - Nicole

Linked at:

Monday, September 3, 2012

Grilled Pork Chops with Plum Sauce


Happy Labor Day!! Although I don't know how happy everyone will be today considering it is the unofficial end of yet another summer that went by way too fast. Even though the beach days are over and the kids will be going back to school, don't forget you can still continue to use your outdoor grill. Plums which are a summer fruit will be in abundance for a little while longer so eat them while you can. This plum sauce is sweet and sour, giving the juicy pork a great fruit topping. 

Ingredients:
5 Ripe Plums - Sliced
4 Thick Cut Boneless Pork Chops
2 Tsp Fresh Ginger - Minced
2 Tsp Minced Garlic
1 Cup Chicken Broth
1 Tbsp Canola Oil
2 Tbsp Honey
1 Tbsp Chinese Five Spice Powder
S&P

Adapted from: http://thewellfednewlyweds.blogspot.com

Start by preheating your outdoor grill to medium heat. Next, wash and slice your plums, discard the pits. Mince your garlic and ginger. Pour the oil in a pan over medium heat. Add the plums and ginger, cook stirring occasionally for 3 minutes.
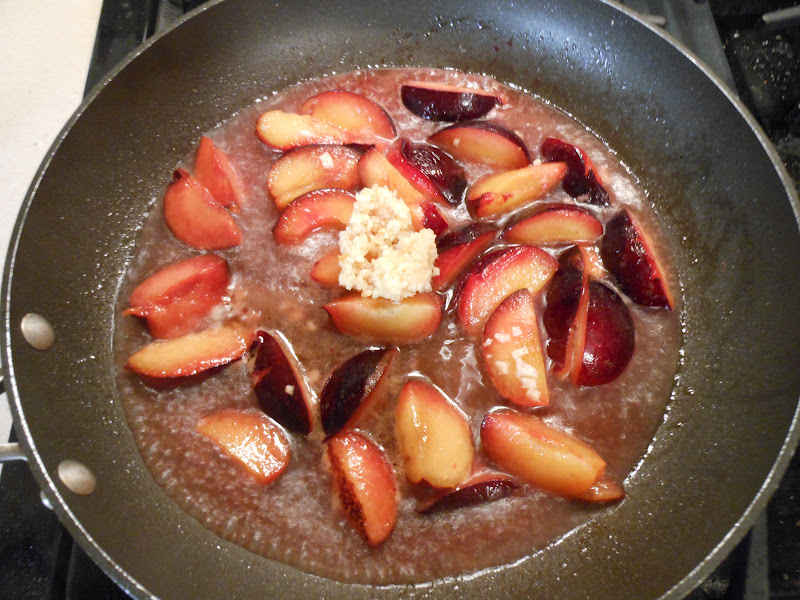
 Next add the garlic and chicken broth, give it a few good stirs and cover the pan. Let it simmer for about 5 minutes. While the plum sauce is cooking you can work on the pork chops.
 Season both sides of the pork with salt & pepper. Sprinkle the Chinese 5 spice powder over the tops of the chops and rub it into the pork, do the same thing on the bottom side of the pork chop as well. Spray or oil down the grill and place the pork chops in the middle. Go inside and check on your plum sauce, take the top off of the pan and allow the sauce to thicken for 5-10 minutes as the pork cooks.
These pork chops were not that thick so they only cooked about 5 minutes on each side. Be careful to change your grilling time depending on the thickness of your pork. When they have finished cooking take the off the grill and set aside.
Now that your plum sauce has cooked down, stir in the honey. Cook for additional 2-3 minutes. Top each pork chop with a heaping table spoon of Plum Sauce. These fruity pork chops paired great with mashed sweet potatoes and green beans.

Thursday, August 23, 2012

Grilled Asian Eggplant with Stir-Fried Veggies


Stir fry is so versatile we have it all of the time. I usually serve it with chicken or shrimp, varying the sauce and the vegetables so it doesn't get repetitive. Our Alan's Orchard box came with Guyana Eggplants and a recipe for Grilled Eggplant with a Soy Ginger Glaze so I thought that it would go perfectly over some stir fry. The glaze is delicious and gives the eggplant an amazingly sweet and buttery flavor. You can serve the eggplant alone over rice or as a side dish but it works perfectly as a complete meal over some jasmine rice and whatever stir fry vegetables you have in the fridge.
Ingredients:
2 Long and Skinny Eggplants (About 1 lb)
3 Tbsp Soy Sauce
2 Tbsp Teriyaki Sauce
2 Tbsp Mirin (Sweetened Sake)
1 Tbsp Sugar
2 Tsp Asian Sesame Oil
2 Tsp Sesame Seeds
1 Tbsp Ginger - Finely Minced
1 Red Pepper - Diced
1 Can of Sliced Water Chestnuts - Drained
1 Head of Bok Choy or Baby Bok Choy
5 Scallions - Diced
1 Tbsp Vegetable or Canola Oil
1 Cup of Jasmine Rice

Adapted from Week 14 Flyer of Alan's Orchard Fresh Box
Originally from One Perfect Bit

Start by making the soy ginger glaze for your grilled eggplant. In a small saucepan combine the soy sauce, teriyaki, mirin, sugar and minced ginger. Bring to a boil over medium heat, stirring to dissolve the sugar. Simmer for 1 minute. Take off of the stove and cool completely. When it is cool you can stir in the Sesame Oil. Set aside.
Now it is time to prep all of your veggies. Wash your bok choy well, cut off the stems and cut each leaf into 3-4 pieces depending on its size. Slice your eggplant lengthwise about 1/4 inch thick for each piece. Dice your scallions and red pepper. If you are going to have the Jasmine rice, now is a good time to get a medium sized pot of water boiling on the stove. Cook the rice according to the package, mine took about 15 minutes to become light and fluffy. Heat a wok or your largest frying pan over high heat, add the vegetable oil. When the wok and oil are hot, add the bok choy and toss to coat stirring occasionally.
Prepare your outdoor grill to a medium heat and spray with some Pam for Grilling or grease your grill down with a little vegetable oil. Bring your sliced eggplant outside, as well as your glaze, a basting brush and tongs. Brush one side of the eggplant with the glaze and then place that side down on the grill, do this for each piece. If you have a cooking partner while you are grilling the eggplant they can monitor the rice and the stir frying veggies. If you don't you'll end up running back and forth from the grill into the kitchen like I did about a half a dozen times to try and have everything finish at the same time haha. Once the bok choy has cooked down you can add the red pepper, water chestnuts and most of the scallions to the wok, stir everything together and cover.
Grill the eggplant for 2-3 minutes on this side. When it is almost time to flip all of the eggplants brush the top side with the glaze then carefully flip them over using the tongs onto the other side. Allow them to cook another 2-3 minutes. Some of the thinner slices were soft with grill marks after about 5 minutes in total, other slices needed another flip and a few extra minutes so use your best judgement.
Once the eggplants are finished, take the off the of the grill and set aside. Your rice should be done by now and your stir fry veggies should only need maybe another minute or two of cooking time.
When everything is ready to go, put a heaping spoonful of rice in the bottom of a bowl, top with some of the stir fry veggies. Take two of the grilled eggplant slices and roll them up. Drizzle a Tbsp or two of the glaze over the whole bowl and top with the sesame seeds and scallions. Serve immediately.
Enjoy!! - Nicole

Related Posts Plugin for WordPress, Blogger...